Friday, November 30, 2012

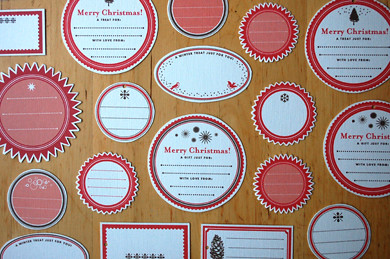
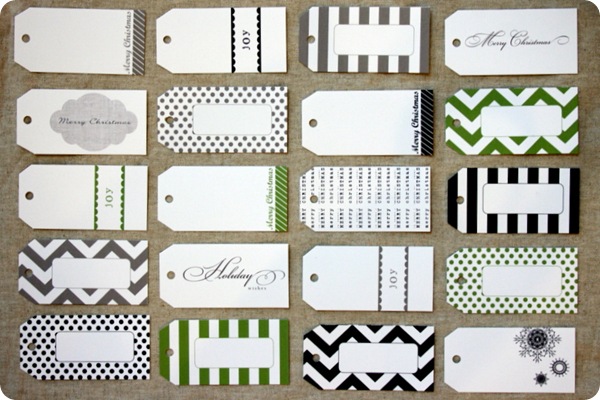
Freebie Friday: To: YOU. From: Me. Christmas Gift Tags


IMG_7590
http://jonesdesigncompany.com/holiday/gift-tags/
I can't believe it's Friday, again...already!!! That means we only have a few more weeks until Christmas.  I truly think that giving IS better than receiving, so, with that in mind, here are some fabulous printable gift tags to make your wrapping and giving a little more fun! AND THEY'RE FREE!

I was just going to link to one, but I couldn't sleep so I just kept finding more for you :)
I have tried to find one for every wrappers style/personality.
Which one is your favorite? I couldn't choose.
XXXOOO.
www.eatdrinkchic.com/post.cfm/holiday-freebie-typographic-gift-tags
http://www.designsponge.com/2010/12/merry-christmas-downloadable-holiday-tags.html

Free-printable-gift-tags-download

http://susanconnordesign.typepad.com/heysusy/2009/12/from-me-to-you-free-printable-holiday-gift-cards-.html


www.eatdrinkchic.com/post.cfm/reindeer-hugs

http://www.tipjunkie.com/holiday-crafts/christmas/naughty-or-nice-printable-gift-tags-christmas-printable-gift-tags/
http://www.eatdrinkchic.com/post.cfm/free-holiday-knit-gift-tags
www.marthastewart.com/276334/holiday-gift-tags-and-labels/@center/307035/santas-workshop#242700
http://lovelydesign.blogspot.com/2010/12/christmas-gift-tags-for-me-and-for-you.html

Wednesday, November 28, 2012

House Tour: DIY Wainscoting with Heather & Brad


 My incredible friend, Heather has a cool new look going on at her place, and she's been gracious enough to share pictures! She and her husband have survived a major dining room transformation. It took them 7 days (and nights) to install new floors and craft these molding and wainscoting.  They did everything themselves! This was not their first DIY...let's just say that Brad is handy with a tool belt. He's tackled renovation projects including wainscoting and molding before...but their smart approach lets me believe that even someone with only a tad bit of actual installation experience could do this. I died and went to heaven when I saw their summer DIY project: their laundry room. (see below). This is super inspirational for me because I love wood work.  I think it fits just about any design style.  In most new house construction they tend to skip 'add ons' like molding and paneling, built in bookshelves, etc. and it is quite rare to even have a window sill, let alone wood paneling.  This adds INSTANT CHARACTER to your home.


I really have to applaud Brad for making some smart decisions (here he is not far from his level)...knowing which decisions were worth the time and which ones weren't.  In the above pic, you can see the original chair rail mark.  They bumped the height up by a few feet, to make sure that their new paneling has maximum impact. You don't have to do this. If you already have a chair rail, you can easily go off of that...but look at the difference that going higher has made. It certainly creates the desired visual effect of enlarging the room both in volume and height. Not to mention, that with a darker paint shade and dark flooring, having the white paneling be so tall really brightens and lightens up the room. LOVELY!!!
You would also want to consider whether you were going to use the wall as the back surface or install another layer of either pre-fab beadboard or use another layer of wood surface...taking into consideration that if you bump out the depth of the wall, you will need to bump out the electrical sockets.  If you use the wall as your back board, then you won't have to mess with your outlets.
Craftsman Style Wainscoting in bathroom
Laundry Mud Room with built-ins, magnet board, subway tile, etc.
So here is what they've been up to! Quite awesome! THANK YOU HEATHER AND BRAD FOR LETTING US PEEK!!!

If this inspires you, as it has inspired me, you won't be able to look at your own walls the same way, so here are a couple of  links to some other DIY  molding and paneling projects to see just what it takes to get this look!

DIY Wainscoting
http://www.centsationalgirl.com/2010/05/adventures-in-wainscoting/


I LOVE THIS...HAVE TO HAVE THIS!

Tuesday, November 27, 2012

Painted Furniture: do or don't?


I don't like getting too many catalogues in the mail, but the other day, I got three...WISTERIAETHAN ALLEN and BALLARD DESIGNS, and all three had painted furniture on the cover.  The Ethan Allen catalogue kind of surprised me..instead of thinking, "why do I get the Ethan Allen catalogue", I thought, "that is the same color my desk was painted when I was a kid". It was a green, painted, 4-poster bed.  It was a bold, Key West kind of color and very '80s although it belongs to their "Vintage" design line. I've seen a TON of turquoise, burnt orange/tomato red, gray and of course white and black painted pieces in th least few years, but I think there is a big design shift that is going more main stream. The Ballard Designs line, Casa Florentina, is fabulous and can be copied with a can of paint and a garage sale or grandma's attic.
Ballard Designs Casa Florentina "Josephina" wall unit
in distressed gray
Ethan Allen "American Colors" Collection


Coastal Christmas
Wisteria


In general, I love painting pieces of furniture and I am usually all for it. I am not a fan of matchy-matchy bedroom sets, etc. People are starting to get away from the all the same shade/stain of wood look...you know the all cherry, all mahogony, all pine dining, bedroom, living room sets. I think this is an East Coast influence where things are more of an aquired or collected look rather than a go to the big furniture showroom store and pick out a whole room all at once sort of experience.  This comes back to my mantra: no matter what your style may be I think a good design starting point is to try to achieve a "collected" look, a look that comes together over time. Even if you have modern taste, there are certain things that you can do to achieve this without resorting to the boxed set, which I will only excuse in the case of a child's room.
Back to painted furniture,  there are a few things that I'd want to think about before I get my brush out though.
1. It is neither easy or fun to try to reclaim a painted piece of furniture, so REALLY want a change if you are thinking about this...there is sort of no going back (there is but it is labor and time intensive so consider this permanent or don't do it).
2. Is this a piece that you may want to use in another part of your house? If so, consider this when choosing a paint color so that in a year, if you do want to move it, it will work in various other places in your house. (see my personal example below, where I painted my bedroom dresser and now it is in my dining room...gray paint works everywhere :)).
3. Consider the wood. If this is an IKEA bookcase we're talking about, go for it. If this is your grandmothers coffe table and it is a real, aged hardwood like tiger maple or something, I'd think long and hard about painting it. Some valuable pieces of furniture will instantly lose their value if you change the original finish of the wood. This hasn't always stopped me though and don't tell my antique appraiser father, but if I truly don't like a piece and know it will look great painted, and I know I am never going to care about the "value" of something then I still go or it. This however, is a HUGE consideration when thinking about painting a permanent fixture in your home such as kitchen or bathroom cabinets or built ins. Seriously consider how long you're going to be in your home. Look at comp values of other houses and whether they have painted wood work, etc. as long as you do a professional looking job, it could very well add to your home value, updating a dark kitchen, etc.  When we purchased our home, the kitchen cabinets had been painted by the previous owner. They were very sloppily done, and totally unprofessional. It almost stopped us from buying the house. Not just because it was an ugly aesthetic sticking point, but it was a red flag to me; I thought, "what else has this lady been re-doing on her own, with terrible results?"  It really made me wonder and question the quality of other things around the house. And rightly so, because the nice iron lighting fixtures turned out to be spray painted brass that flecked off chipping black spray paint the day we moved in and I cleaned house.  So if you are going to tackle a big built-in project, really commit to doing it well so that you are happy with the end result and you can achieve a professional finish. Because at the end of every project, you want to have something that is better than when you started.
4. Prep your surface.
5. Test an area. This sounds good, I have to admit though, I usually just go for it. But sometimes I've had to change things after the fact. Test an area on the back or the side of the piece to make sure that you like the dried paint color, etc.
6. Sand in between coats.
7. Finish...wax or poly coat, at least once, twice, three times, maybe.
8. The AWESOME thing about painting furniture is that a piece that you maybe wouldn't even notice in a room before now has a new life.  You can chose a fun accent color and the piece can literally have a totally different look or vibe in your room.

Here is my latest painted furniture experiment that I did at the end of the Summer.
I'm pretty happy with how it turned out.
Bedroom Dresser  New Dining Room Buffet

IMG_1317.jpg
For years I've hated my bedroom dresser. We bought it on a whim, after we had moved back to the States from Japan. I needed Bedroom furniture and we bought a set. Ugh. Bad decision. It is like processed particle board composed whatnot and nothing special. But it is solid and sturdy if not super ORANGE. Yes, I said orange. For those of you with ORANGE Pine furniture, there is hope, this isn't any good pine or anything, they chose for this to be an orange pine stain and I bought it. Yup, and for ten years I've wanted to paint it...so I did. It took me 2 hours. I wish I had done it 9 years and 11 months ago.
Do you have any DIY painted furniture projects you've taken on or are thinking about?
XXXOOO!
Friday, November 23, 2012

Freebie BLACK FRIDAY EDITION!!! Free Christmas Printables!


Today is the dawning of the Christmas Season....so since you're presumably spending $ today, here is a fantastic free paper craft you can do just by downloading and printing it out!  (I actually loathe shopping on this day and prefer to spend the day getting ready for Christmas in other ways, so this fits the bill for me, too).

Maybe you've heard of TOMKAT STUDIO...if not, don't worry, it has nothing to do with Tom Cruise.
It is a fun, incredibly creative, bright, paper studio.  They FREQUENTLY have freebies that you can download and print on your own. I've sifted through the Holiday ones for you to check out.
Hope there is one (or several) printables that you can use!

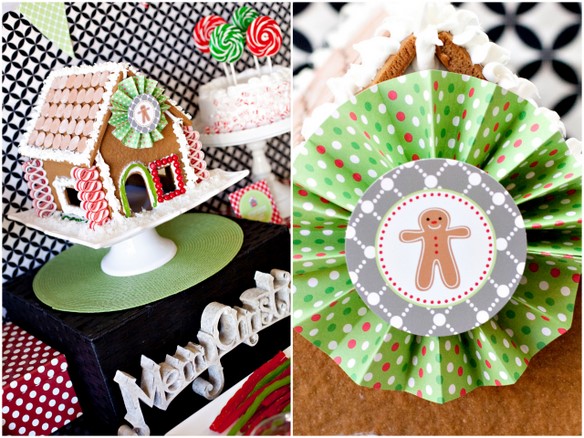
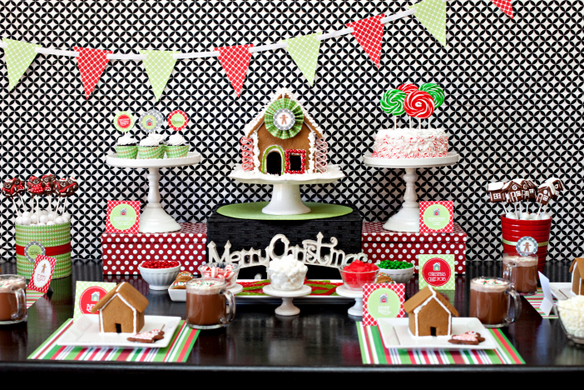
Here is the GINGERBREAD PARTY printables that TOMKAT did for HGTV.  I don't think I'll be having a gingerbread party anytime soon, but I can use some of these for decorations and wrapping.
Gingerbread house party free printables

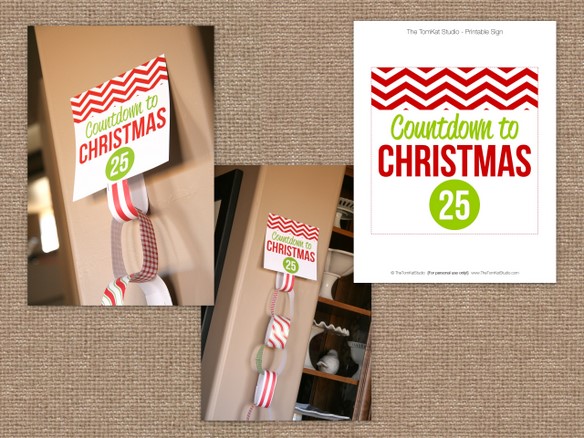
This is a super cute and easy COUNTDOWN TO CHRISTMAS PAPER CHAIN...just print this out and VOILA! Fun activity for you and your kids!


If you have a sweet tooth and are looking for a new recipe, try this.  All the labels and recipe cards are ready to go!


Here is a TOMKAT Vintage Rudolph party. Use the "DEAR SANTA" paper or other party ideas as gift labels.


I do this with my kids each year. This would be a fun gift for neighborhood kiddos, bus stop kiddos, any little ones would love to have this standing by to start a new Christmas Eve tradition! Leave Reindeer food on the front lawn :)

Another baking idea: Chocolate Scotcheroos...recipe cards and labels.

Hope your Friday isn't a black one- but rather it's a Merry and Bright one!
XXXOOO!!!

Wednesday, November 21, 2012

Faux Bois DIY

winter white faux bois vases cg

As a follow up to the Faux Bois tutorial, I thought this little project that I found on Pinterest from Censational Girl would be fun to try. There are endless paper and painting projects that you can do with the faux bios technique (cards, trays, etc) but I thought this would be fun because it resembles the newest craze in faux bois: birch.
This cost me just over $9...I purchased my glass vase at the $ store and everything else at Lowes.
I was pretty free with the silicone, it looked gloppy, but no worries. Then 24 hours later, I followed with etching spray, and then finally, about 20 min after that was dry I sprayed with the primer. I needed two coats of primer when it was all said and done.
Click this link for Complete directions for faux bois vase project!
winter white faux bois vases cg

This is what the silicone phase looks like.
 If you can find a silicone with a finer tip, you'll be happier!
Almost dry!
I LOVE how mine turned out.  Im thinking of trying to perfect this and get the bark lines finer and I may try to do glass Christmas ornaments next week!

Tuesday, November 20, 2012

Pining for Faux Bois


"Faux Bois" is a classic design pattern. It is French for "false wood". Various uses of the pattern and furniture technique (see below) trace back 200-300 years to craftsmen in France and Italy.  The pattern emulates wood grain, the knottier (not naughtier) the better. In the 70's there was a lot of burnt orange, avacado and rust faux bois to go around.  I credit Martha Stewart for the re-birth. Maybe she had a favorite faux bois pot holder from 1973 that served as inspiration, but she started incorporating it regularly into her crafts, decor and yes...desserts where any good French baker can say he creates faux bois when baking a Bouche de Noel or Yule Log.   Since about 2006 the pattern and the faux bois style in furniture has become a quiet presence in design. What was once quaint, rustic or woodsy is now appearing in more often a fresh,  Scandinavian influenced color pallet.  Martha's been a big faux bois pusher, year after year using the pattern in everything from note cards to rugs. Big designers took notice and it's been mainstreamed.  Etsy has been on the band wagon, too.  And with the new BIRCH FAUX BOIS look poping up everywhere (have you seen Anthropologie's Woodland themed Christmas Windows and store decorations? GORGEOUS!) this pattern is proving to have staying power.  It has been building steam and is ready for a huge resurgence again, waiting patiently for its friend CHEVRON  to move along. So whether you like it or not, I think this season you'll be seeing it quite a bit at both ends of the price point spectrum, from high end designers to TARGET! If you chose to love it, use it sparingly.....once in a room, as an accent. For example if a room has a faux bois lamp, then that's it. Don't go for the faux bois rug, planter and throw pillow.  And if you like but can't see this quirky pattern in your home, they have note cards for that. What do you think of faux bois? Love it or lose it?
Come back tomorrow for a faux bios DIY just in time for the holidays.
XXXOOO.

Funky Faux Bois pattern:


Faux Bois furniture style:


High Price Point:

Ross Sveback $126


custom fabric, $42 per yard


Low Price Point:
 

Target "Woodgrain" Platter $9.99

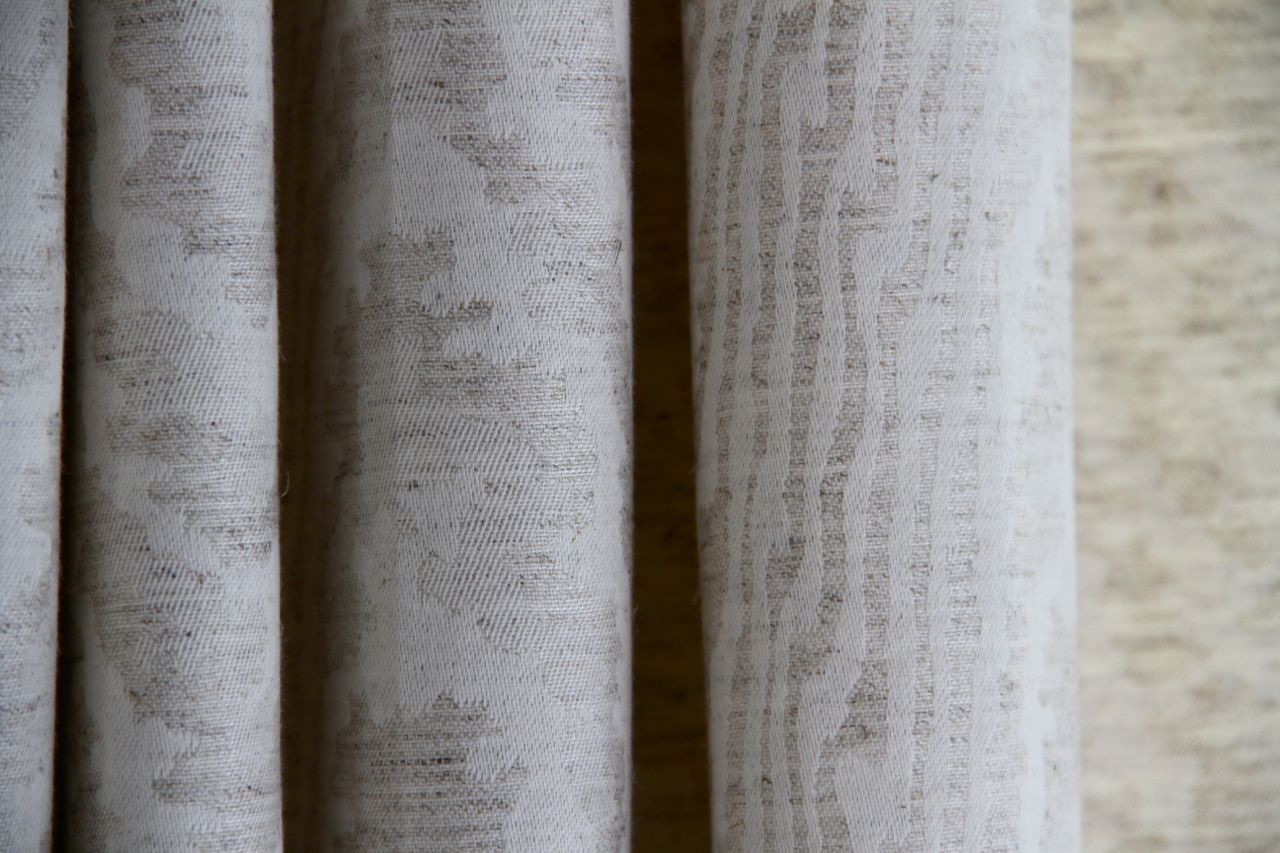
West Elm Faux Bois Burnout Curtains

Friday, November 16, 2012

FREEBIE FRIDAY: Amy Butler Design

www.amybutlerdesigns.com
 
What better way to kick off Commona-my house's first FREEBIE FRIDAY than with another Amy's designs! Amy Butler has been a favorite of mine since her first fabric collection came out several years ago. She pretty much owns (literally probably through copyright) the design term "MIDWEST MODERN". Her style is bright, fresh, fun. Many of her patterns remind me of funky 70s wrap around skirts my mom used to sport back in the day with her Pappagallo Espadrilles. But Butler adds a contemporary twist to her designs, using bold color choices. She sells everything from her core fabrics to a slew of products made with said fabric. Here comes the freebie, or I should say FREEBIEEEEES! She has quite a spectrum of FREE Patterns on her studio site...everything from quilt and duvet patterns to pillows to simple crafts and accessories. That I guess you wouldn't have to use her fabric to make, although after looking at a few of these quilts, I would LOVE to make one if I ever develop the patience to quilt. Check out her studio and tell me what your favorite pattern is!

Happy Free Friday to YOU!
XXXOOO!

FREE Amy Butler Studio Quilting, Sewing & Craft Patterns

Thursday, November 15, 2012

Thursdays = Roundup

Each Thursday I will pull together some ideas that I've seen on-line and Pinterest that week.  You never know what your're going to get, but I'll keep it fabulous! I try to link to the original website when possible.  Over time, I'm sure that you'll start to see some of the blogs and sites that I love visiting. I'd love to hear about and check out some of your favorites, too!
XXXOOO!

Do you decorate for Thanksgiving or jump right to Christmas?


Are you a Traditionalist? Do you decorate for Thanksgiving or jump straight to Christmas? Poor Thanksgiving....it can't compete in between the commercialism of  Halloween and Christmas. 
To me, November means Thanksgiving. I don't break out the Christmas bells from Tupperware storage until I'm making leftover turkey sandwiches from Thanksgiving dinner. I totally get the whole, "I love Christmas and I want to get the most out of all the work and thrill there is involved in Christmas lights, trees, garland and glitter".  But there is I guess then something nostalgic, dare I sat retro, in being a Thanksgiving decor embracer. And I guess, now as a mom of four, I'd like to cram as much thankfulness and gratitude down my kids throats before they start asking for things come Black Friday. Call me old fashioned!

When I was into kids crafts, feathers and pilgrims and the Mayflower showed up on my table. I'm not so much in that stage anymore....my typical Thanksgiving decor consists of natural items (things I find outside) and left over pumpkins from Halloween. I don't go over the top...it's a humble holiday, after all.
That's what I think? How about you? What do you do for Thanksgiving decorations or traditions?

Here is a little web round up to show how you can keep it simple.

-Thanksgiving used to be all about putting down your "NICE" table cloth, but not necessarily anymore.  Put brown craft paper down on your table. Or find a couple of yards of fabric you love, (burlap is having a moment), don't bother sewing- cut and fold edges to form a table runner.   No matter what your style, it's easy.

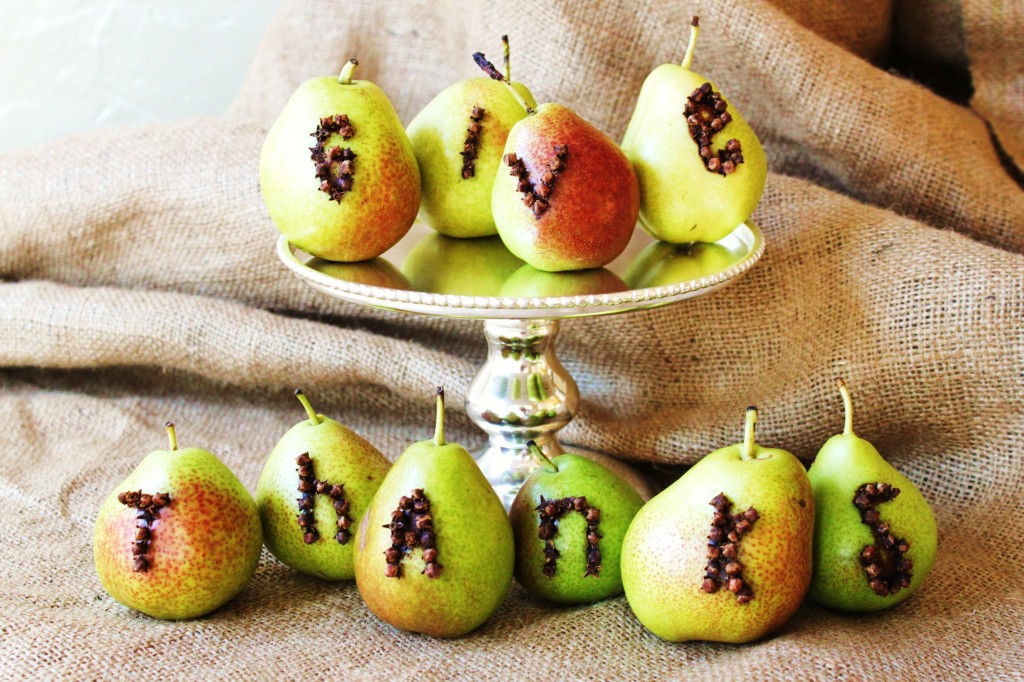
-"GIVE THANKS"- To make the pear display at the top of this post, you'll need 10 pears. (Make it 12 in case you have an "OOPS"). Take a sharpie marker and make each letter on the pear. Then place cloves in each pear for every cooresponding letter.
 
-If you're not into going over the top, go to the grocery store for your decor!  Pick up a bag of cranberries, pears, pomagranates, apples, cinnamon sticks, cloves, anything will do.  Then use what you have around your house: many of these ideas can be spun with a clear glass vase (keeping things streamlined and simple, glass jars, vases, or yes, maybe even Grandma's special compote.  You can have a lovely display, with minimal effort and come out looking chic .

-If you're minimalist, don't be turned off by the vintage vibe in the pic below...I think I'm going to steal this mantle idea this year.
I love this very New England look put together with found objects, pumpkins and quick embelishments.
photo.JPG
www.bhg.com

The look below has a lot going on. And it works.  But there are several great elements within this busy table scape.  Personally, I would choose a few of these at a time.  I love the fresh color pallette of green and aqua with pops of yellow and orange. Some other items to take away from this:
1. The table runner either in an unexpected pattern or burlap, which is having a moment (fold under a piece of fabric, no need to sew...I've been folding for years. No one ever looks and you can use the fabric again without committing to just a table runner). 
2.The flowers are in simple jars which are wrapped in twine for further texture and to tie (no pun intended) in the burlap natural sub-theme she has going on.
3. If you look closely, you will notice that each green pillar candle is sitting on top of a cut slice of log. I love this and think that you could run with this idea for Thanksgiving and Christmas use.
4.Natural elements again in center branch arrangement. I believe that she also has a few peacock feathers in there. For a more traditional look, pheasant feathers would be pretty and if you're not going with the quirky turquoise color theme, I'd scratch the peacock feathers and save 'um for another day.
5.  I kind of love her cork board, which is obvs not a Thanksgiving decoration, but she has family pics and can you see the "gather" squares tacked to the board.  Simple burlap (did I say that if you haven't noticed it's EVERYWHERE and has been IT for a while now).
6. She's using her "Good" china.  If you have some, use it. If you aren't going to use it on Thanksgiving, when are you? She's displaying her platters and other serving pieces on the table before they are covered with dinner and I like that.
7. The napkin ring/holders are cute. This is a great place to get the kids involved in what is not typically a fun holiday unless you throw in a few kid friendly things.   

What do you think?
Is there something(s) that you love to do to give Thanksgiving it's own flair?
I'd love to know!
XXXOOO.