Monday, December 31, 2012

Hanging Plates


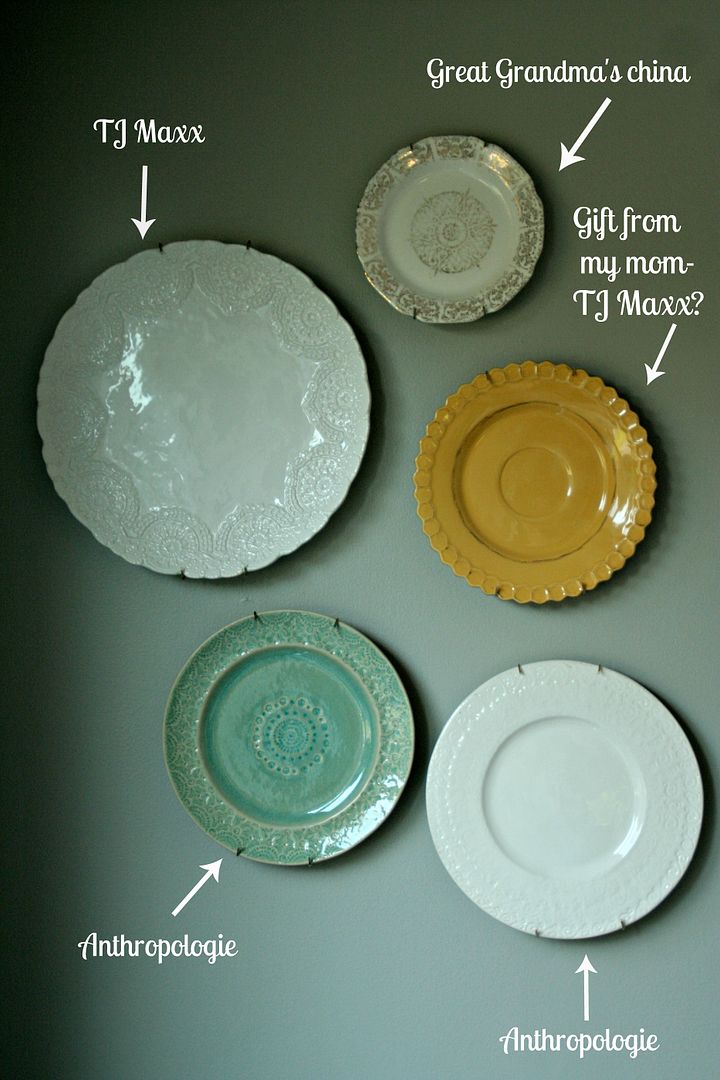
hanging pretty plates in the kitchen

The idea of hanging plates on your wall isn't a new one. I love hanging "things" as art on my walls.  Instead of  rectangular framed art, rectangular framed art, rectangular framed art...this is a fantastic option for bringing color and style into your living space.  Whether you are traditional or modern, you can pull this look off simply by the plate(s) you hang and how you hang 'um.
I've used the old wire hanging devices like this,
 Product Image, and they are just fine BUT there is a new product that is FABULOUS and hidden. Pick these babies up at Hobby Lobby, hardware stores and online for a seamless look.
The Flatirons <em>Disc</em> Co. 4" <em>Disc</em> Adhesive <em>Plate</em> Hangersor  One 5 Inch Invisible English <em>Plate Hanger Disc</em> Ebarb:)

and start planning an hanging one or 20 of your favorite plates!

The Look:


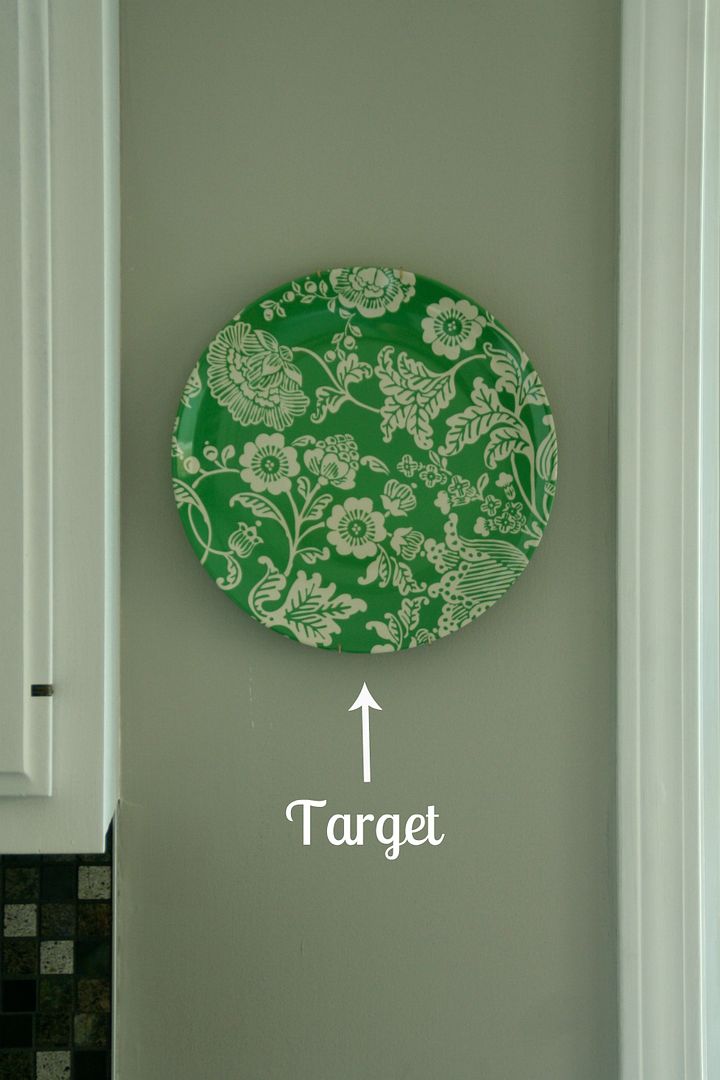
What caught my attention was the curve of the placement it creates a more modern and contemporary way to hang things that we collect - I am thinking mexican pottery type - or cheep repro anything!  Plates work! anywhere -

hanging plates on kitchen walls add so much.

Invisible plate hangers...DIY

DSC_0366-1

DSC_0385-1

Hanging Plates

tips to hanging plates

XXXOO.

Happy New Year!


Happy New Years Eve! And Happy 2013.
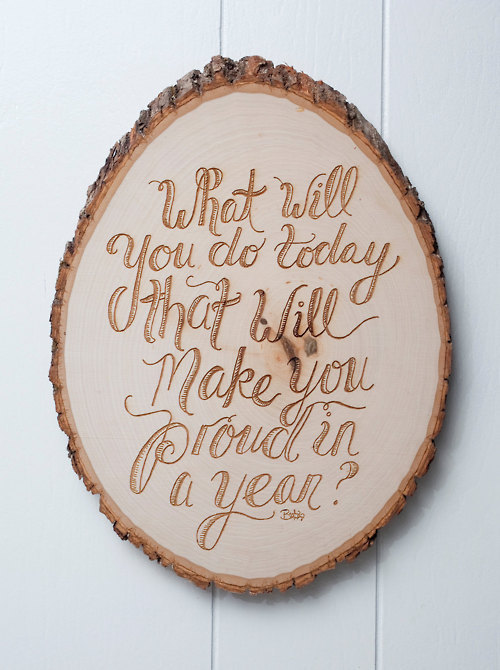
I'm taking a little time today to think about the goals that I am going to set for myself tomorrow, on the first day of 2013.  Goals are important. Just like you would have a plan for remodeling a bathroom, I think I need to start thinking of a plan for my year. So, I ask "What will you do today that will make you proud in a year?" It's not an easy question. But I am now at the age, 39, when I think I need to be more thoughtful and specific about the direction that I go in my life.  I know that one of the things that will be on my 2013 list of goals will be to continue to make Commona-my House a happy, positive little place for us to visit and chat about ways to enrich our homes.  Thank you for stopping by and for being my guest here.  I can't wait to share 2013 with you.
What are your goals for 2013? Organization, bathroom renovation, vacation, detox? Just wondering....
XXXOOO.

Saturday, December 29, 2012

Freebie Friday: Monogrammed Charger Printables

What better way to start the new year than with getting a bit organized. Does it sound fun to you? It doesn't sound fun to me...when I think organized, I think of all of the work that is going to go into cleaning out closets, labeling pantry items, etc.  So I was looking for something a bit perky to get me going.  And thanks to For Chic Sake, I have just the right little project to kick off my New Year of being organized and on task.
We always seem to have chargers kicking around. No one can ever find one when they need them, and there is only 1 (out of 4) that works with my phone for some reason! Now I'll know which one is which and will be inspired to keep things a bit more tidy.
dress your tech Dress Your Tech: Printable iPhone Charger Wraps and Home Button Stickers


Click on the links above in order to download and personalize your very own charger labels. And I can think of just about 101 other uses for these labels as well!
XXXOOO.

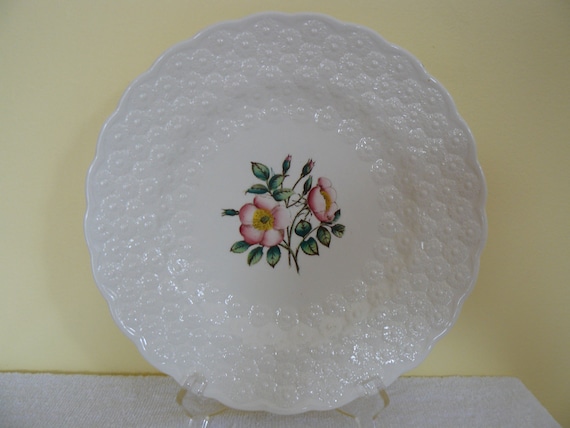
Antiques 101: SPODE

Dinner Plate in the Blue Room Garden Collection(mixed Color) pattern by Spode China
Spode, "Jasmine, Turquoise and Black"

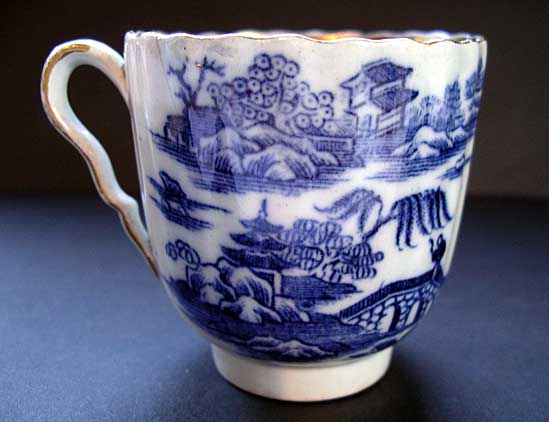
Spode is a brand of ceramics and fine bone china based in Stoke on Trent, England, founded in 1767. That means, yes, Grandmas have been collecting Spode since the mid to late 1700s.  Josiah Spode was renowned for his technique of blue transferware, underglaze pottery.  My mother and grandmother both LOVED the Blue Willow Spode pattern, possibly the most well know and most popular of them all. They have countless patterns, popular for the past 250 years.
But I think there is a SPODE pattern for just about anyone.  There are countless colors, patterns and motifs of SPODE china. The originals are sought after, but they have new reproductions as well as new patterns. Interestingly, SPODE today is owned by the Portmerion Group (Portmerion being the manufacturer of another example of highly collected pottery).

Some collectible notes: Anything after 1833 is considered "Late SPODE".  The company changed hands at this time and for collectors that is a designation.  You can find old and new SPODE just about anywhere; it is typically at flea markets and antique shops, yard sales, ebay.  Its popularity has continued through the ages, so popular still that it is currently sold at Amazon, Macy's, Nieman Marcus, Horchow and don't be surprised if you see a SPODE Christmas pattern even at TJ Maxx.

If you love a pattern and see it at TJ Maxx, good for you, you have a special piece and you can call it an heirloom.
If you're thinking of collecting SPODE check out this little SPODE starter roundup. The new "Archive Collection" is a series of reproductions of popular antique patterns.  The back of the place will clearly state is an "Archive Collection" piece. Therefore, if you are buying ANYTHING on line, you should always ask to have a picture of the back of the plate for reference.  This could make a difference of paying $35 for an Archive Collection set as apposed to $200+ for an original set. (see below for examples).

Here are the markings on the back of the plates/dish that will tell you when your piece was produced.
Spode 1.JPG
Spode 3.JPG

The Look:
Like I said, there are COUNTLESS patterns, colors and motifs.  Here are just a few.

One of the earliest Spode patterns, this fluted tea cup,  in "Two Figures" pattern,  1785-1795
1815 Spode "Tower Pattern"
Early 19th Century English Regency Spode Platter, handpainted enamels in the Peacock Pattern,
valued at $1250.00
A Large Blue Willow Deep Spode Platter, Early 20th Century
Spode "Blue Willow" Platter

north carolina interior designer kathryn greeley presents spode holiday china
 Spode "Indian Tree Orange"
Jade and Gold, Spode Copeland's, 1891-1900

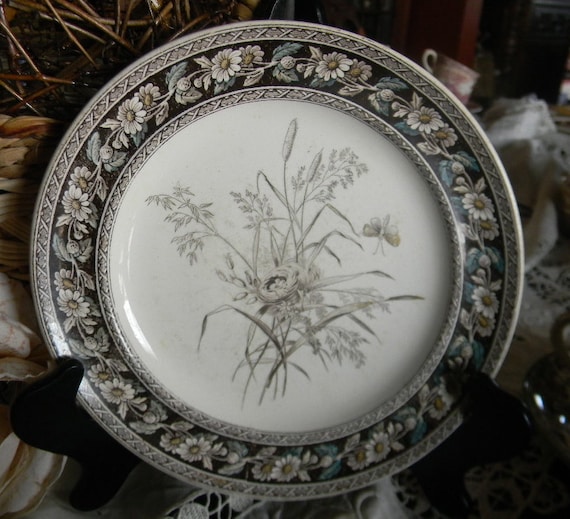
Victorian Aesthetic Movement Brown Turquoise Transferware Plate Spode W T Copeland Birds Nest Butterfly Daisies and Wildflowers
Spode Victorian Aesthetic Movement ,"Butterflies and Daisies" Chocolate Brown, robins egg blue, yellow
Copeland  Spode Canadian Centennial Alberta
Spode Canadian Centenial "Alberta"

Gray and silver "Coral", 1964

spode nectar
One of the recently manufactered patterns, Spode "Nectar", now discontinued and sure to be a collector's item

spode woodland
Spode "Woodland Theme: Winter Elk"
Spode Christmas Tree Pattern (I love the mistletoe and holly circling the inside of the cup and the saucer).
{If you don't know the story of the Spode Christmas tree, it is a pretty cute one. In the 1930s, one of the designers for the British ceramic company's dinnerware was asked to create a Christmas tree design. The man had never seen an American Christmas tree before and at first drew the tree with presents hanging off the branches! Upon learning that this was not how the presents were placed, he moved them to their traditional spot underneath the tree and drew the tree with decorations of ornaments.  He also didn't know what trees were topped with, hence the Santa Claus figurine drawn atop the tree where a star or angel would normally go.}

I've always wanted to travel to take a look at the Spode Museum's pattern book.  You can visit their factory and museum and take a peek into Spode's amazing living history. 
Here is my favorite! Maybe you recognize the one below from my last post about coconut cupcakes?!
Spode "Jasmine, Mint and Brown"

XXXOOO.

Friday, December 28, 2012

Snow Cups: Coconut Cupcakes.


I have loved this recipe, only making this cake once a year either around Christmas or Easter.  This year, I made cupcakes.  It is the perfect tropical treat for a snowy day.  My kids called the cupcakes SNOW CUPS.
I've modified Ina Garten's orginial recipe, follow hers or if you want a little more coconut flavor, just add 1/2 cup Coconut milk to your cake mix. Just change the amount of milk that you add, instead of adding 1 cup, only add 1/2 cup of milk and your 1/2 cup of coconut milk.  And 1/2 cup coconut milk to your frosting and adjust your confectioner's sugar to get your desired consistency.  (I used Coco Lopez, but you could use any canned coconut milk that is available, usually it is either in the bar tending section or the Asian Food section..I seem to always have some canned coconut milk in my pantry because I use it in my curry).
*If making cupcakes, mine were perfect at 350' for 14 min. Bake until toothpick comes out clean.

Here is the original Ina Garten Coconut Cake and Icing recipe:

Coconut Cake


Show: Episode: 


Ingredients

  • 3/4 pound (3 sticks) unsalted butter, at room temperature, plus more for greasing the pans
  • 2 cups sugar
  • 5 extra-large eggs, at room temperature
  • 1 1/2 teaspoons pure vanilla extract
  • 1 1/2 teaspoons pure almond extract
  • 3 cups all-purpose flour, plus more for dusting the pans
  • 1 teaspoon baking powder
  • 1/2 teaspoon baking soda
  • 1/2 teaspoon kosher salt
  • 1 cup milk
  • 4 ounces sweetened shredded coconut

For the frosting:

  • 1 pound cream cheese, at room temperature
  • 1/2 pound (2 sticks) unsalted butter, at room temperature
  • 3/4 teaspoon pure vanilla extract
  • 1/4 teaspoon pure almond extract
  • 1 pound confectioners' sugar, sifted
  • 6 ounces sweetened shredded coconut

Directions

Preheat the oven to 350 degrees F. Grease 2 (9-inch) round cake pans, then line them parchment paper. Grease them again and dust lightly with flour.
In the bowl of an electric mixer fitted with a paddle attachment, cream the butter and sugar on medium-high speed for 3 to 5 minutes, until light yellow and fluffy. Crack the eggs into a small bowl. With the mixer on medium speed, add the eggs 1 at a time, scraping down the bowl once during mixing. Add the vanilla and almond extracts and mix well. The mixture might look curdled; don't be concerned.
In a separate bowl, sift together the flour, baking powder, baking soda and salt. With the mixer on low speed, alternately add the dry ingredients and the milk to the batter in 3 parts, beginning and ending with dry ingredients. Mix until just combined. Fold in the 4 ounces of coconut with a rubber spatula.
Pour the batter evenly into the 2 pans and smooth the top with a knife. Bake in the center of the oven for 45 to 55 minutes, until the tops are browned and a cake tester comes out clean. Cool on a baking rack for 30 minutes, then turn the cakes out onto a baking rack to finish cooling.
For the frosting, in the bowl of an electric mixer fitted with a paddle attachment, combine the cream cheese, butter, vanilla and almond extract on low speed. Add the confectioners' sugar and mix until just smooth (don't whip!).
To assemble, place 1 layer on a flat serving plate, top side down, and spread with frosting. Place the second layer on top, top side up, and frost the top and sides. To decorate the cake, sprinkle the top with coconut and lightly press more coconut onto the sides. Serve at room temperature.

In the picture above, there is a hint about what tomorrow's 'Antiques 101'  post will be about.  Want to take a guess?
XXXOOO!

Wednesday, December 26, 2012

Wisteria Copy Cat Dining Room Chairs

I have been looking for dining room chairs for about 3 years. I'm typically not one to wait, but there was a certain look I'd been hovering around.  It was this from Wisteria.
my inspriation piece from Wisteria

I liked the look, but was NOT FOND of the PRICE. They started at $500 (they are marked down now to $374 a piece). 
But I wouldn't have said that they were my dream chair either. They are similar to upholstered chairs that my mom had in our dining room when I was growing up, which might explain why I just kept coming back to this as my best option. I also am inclined towards French Antiques, but I think most French is too feminine for my husband's taste, so this was a great compromise.  I liked the carved wood and antique look, but would have had to invest fabric on top of the already steep, in my opinion, cost per chair. I like the white Wisteria base upholstery, shown above, but I typically decorate with solids everywhere else so I wanted to infuse color and pattern in my chairs. I wanted 6 of them, btw.  

I found some good old hotel chairs on Craigs list (they were frightening, but had great bones and the overall look I was going for) and got 6 of them for $80.  Then I took my time finding fabrics to keep me in budget.  And finally, here they are! 

Taupe, gray linen for dining room chairs
fabric choice; timuri vinyard in taupe & gray

And I used a gray ticking stripe for the end chairs...

These obviously aren't an exact match for the Wisteria original. But they both have dark, carved wood bases adding to a grounded look, they both have upholstered seats and backs with an interesting curve or design at the top of the back.  With original chair cost, fabric and upholstery expense I ended up investing $36 per chair.
And I'm thrilled. Now on to the dining room table...
XXXOOO.

Monday, December 24, 2012

Gram's Beef Burgundy


My Gram didn't really cook. I think she lived off of Grape Nuts and Yogurt, with a Friday night take out pizza carrying her through the weekend each week. But when she did cook, it was special and soooo good. It's not shocking that her one fantastic culinary masterpiece was a one pot wonder: Beef Burgundy.

Yankee Gram's Beef Burgundy
Ingredients
2 lbs Chuck Stew Beef
2 Tbsp Butter
4 medium onions, coarsely chopped (yes, I said 4 onions)
10 carrots (peeled and chopped)
2 cups mushrooms, or you could use canned mushrooms or none if you're not into mushrooms
salt and pepper to taste
1 cup burgundy wine (the cheaper the better).
1 cup beef broth
4 sprigs parsley
2 sprigs celery leaves (these are the leaves on the top of the celery stalk..this is one of the secrets)!
2 bay leaves
2 cloves fresh garlic
3 Tbsp flour (optional).

How To:
-Melt Butter in large stock pot, stew pot or dutch oven.
-Brown beef and remove from pot (this maybe is crazy, but I put the beef in the flipped upside-down lid of the pot and set it on the counter (why dirty another bowl?, you'll be using the lid while it all cooks).
-Add all vegetables to the pot and saute until tender and brown.
-Remove vegetables from the pot, (I put them back on the cutting board).
-Return browned beef to the bottom of the pot, then arrange the vegetables over the meat, covering it.
-Season with salt and pepper (a dash, a pinch, whatever you prefer), add wine, broth, parlsey, celery leaves,  bay leaves, and garlic.
-Reduce heat to LOW and simmer covered for 2-8 hours.
-DO NOT STIR while on the stove top.  Every now and then, pick up the pot and shimmy it around to make sure it isn't sticking to the bottom of the pot, but do not stir it.  Just gently shake pot occasionally.
-Remove garlic cloves and bay leaves just before serving.
- Optional, but I prefer it this way: Before serving, if you would like to thicken the stew 'gravy' , remove about 1/2 cup of juice from the pot and put in a small bowl.  Add anywhere from 1 to 3 TBSP flour to the juice, stirring to combine. Add this mixture to your stew pot, gently stirring it in right before serving.
-Serve in a nice warm bowl, on a bed of mashed potatoes (I love to serve mine on garlic mashed potatoes) or on a bed of egg noodles.

It's the perfect comfort food on a cold winter's day and I've been making it on Christmas Day for about 15 years now.
XXXOOO.

Sunday, December 23, 2012

How to tie a Tiffany & Co. style bow

One of my favorite memories about opening Christmas gifts when I was a teenager has to do with my Grams. She would always wrap things beautifully and creatively.  She also, showed her wicked sense of humor, because she would find and save boxes from Tiffany & Co., Gumps, Nordstom, Worth, Saks Fifth Avenue, Godiva and the like and when you opened the box you never knew if you were going to get a legitimate AMAZINGLY FANCY gift or whether you were going to get a pair of crappy socks in a Tiffany box.  That was Gram. She thought it was pretty funny to trick you into wondering what you were going to get.

Today I thought that I'd share a little wrapping/bow trick...
How to tie a "knot-less bow", just like a Tiffany bow!
There are so many gift bags and stick on bows that taking the time to beautifully wrap a gift seems like a lost art to me. But giving beautifully wrapped gifts is a gift in itself.

When I worked in Philadelphia, I worked at a PR firm just around the corner from Tiffany & Co.
I once was tasked with coming up with 12 awards for a charitable dinner that I was helping to supervise for a client. I got to help the Tiffany staff wrap the engraved vases that had been chosen to be given as awards.  They taught me how to tie the Tiffany way without getting creases in your  ribbon or using tape and knots.

Satin ribbon is best to achieve this look.
Here's an excellent tutorial from the blog Everyday Treats.
Hop on over for her step by step pics to walk you through this easy and timeless way to tie a ribbon...even if you don't have a Tiffany box or something other than socks to put in it!


XXXOOO.

Saturday, December 22, 2012

MODERN, CONTEMPORARY and STREAMLINED CHRISTMAS

Modern Christmas theme


modern-living-room2

If your style is modern, contemporary or streamlined then fussy isn't your thing. These are huge terms, each with their own specific design genres, but to sum it up for me, these all fall into the category of clean lines, simplicity, orderliness, symmetry, structured, sculptural, with bold patterns or color choices (sometimes the choice being monochromatic which is a statement in itself). Look for texture, metals, fabrics, interesting lighting and contrast to infuse layering and exclamation points throughout these interiors and decor.
Give this style a peek...you might be surprised just how fabulous and versatile these ideas are!
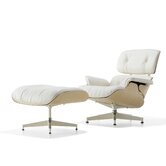
I've seen amazing examples of Christmas decor this year that makes me yearn for an Eames Lounger 
Eames Lounge and Ottoman in White Ash
in front of my fire place! Here are my favorite modern, contemporary and streamlined Christmas decor ideas this year:
Midcentury Modern Wreath
Mid-Century Modern Wreath
DIY Modern Christmas Tree
Suspended Dot Christmas Tree
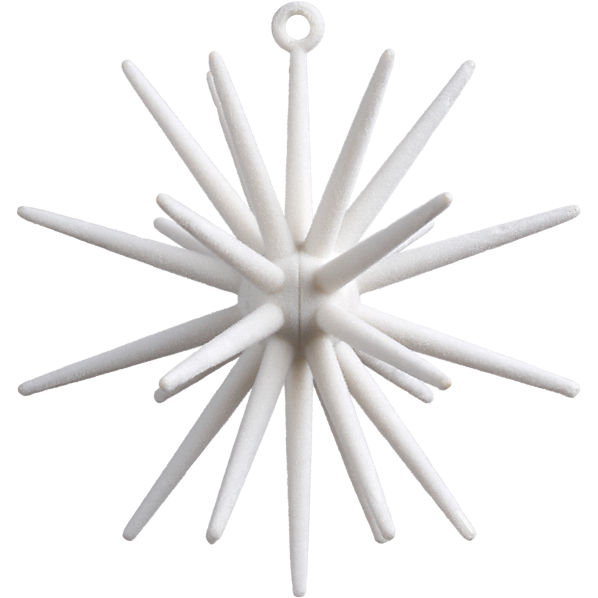
AstroOrnmntWht4inF10
Astro Ornament
Midcentury Modern Christmas Stocking
Mid Century Modern Stocking
20+ Modern Christmas + Holiday Decorations in style fashion interior design home furnishings art  Category
Dwell Studio brass under glass tree design
Modern Christmas
Lit and Lovely!
Light Bright tree
Contemporary Light Strand Tree Triangle
Contemporary Silver and White Mantle
Christmas centerpiece idea: Modern Mantel
Contemporary Flower Arrangement Mantle
Modern-christmas-tree-ornament
Modern/Contemporray Paper Ornaments
Christams Modern Tabletop Tree
Cone Light Trees
I did this last year from my entry hall ceiling with silver & gold & black ornaments & left it through New Years. Loved it
Pop of modern, fresh color combination
Streamlined Christmas
Modern | Christmas Tree
White and Wonderful

Christmas tree inspiration via Ferm Living. A bold, modern rug as a tree skirt.. so modern and beautiful. NOT
Geometric Tree Skirt
Fun and Fresh
modern-living-room
Texture + Cleanlines= Dreamy

...and my personal favorite that I just may make before I pack things up for next year:

20+ Modern Christmas + Holiday Decorations in style fashion interior design home furnishings art  Category
CB2 DIY Bubble Wreath


Hope this has given you a new perspective on modern, contemporary and streamlined decor!
XXXOOO.